
Go nuts for chocolate dipped marshmallows. I tell ya, until you’ve tasted a freshly made vanilla-bean marshmallow, you just don’t know. They are truly special. Then add the chocolate and nuts and look out. Gobble away.
Of course, the first few times I attempted to make them, my marshmallows were a hot mess. Let’s just say that if I served those batches up to the love of my life, he might get confused about my affection for him! It took a little patience, and a great recipe, to get these fluffy wonders right! Allow me to walk you through it, step by step.

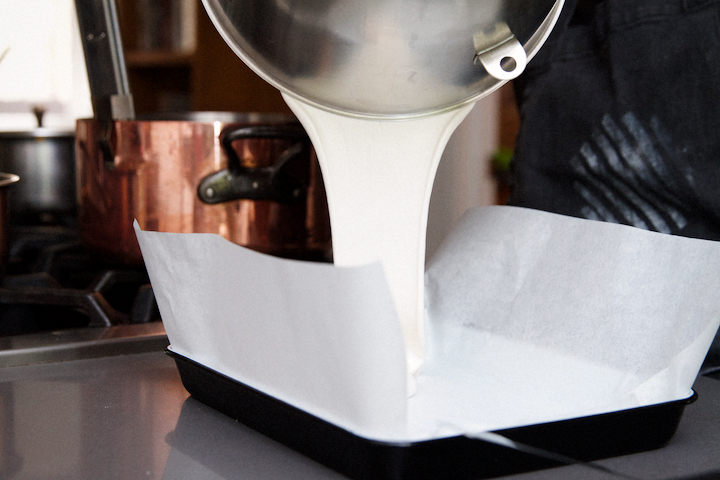
- Spray your 12×9 pan (parchment lined) with a non-stick generously. If you are using a different mold shape, pre-spray that mold well!
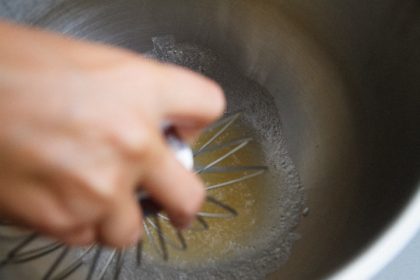
- Start the gelatin base in the mixer bowl itself. Whisk it and let it sit.
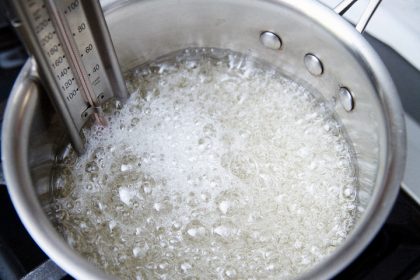
- Next step is to boil the hot liquid mixture.
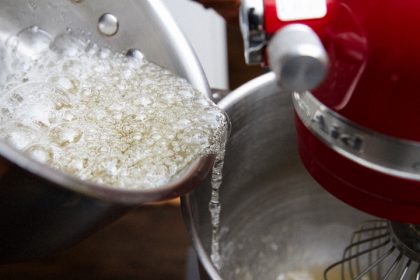
- Last step is to pour it into the mixer. Poor it along the edge of the kitchen aid, while it is mixing at a low speed. Then, once all of the hot liquid mixture is absorbed, then turn up the speed and get those marshmallows fluffy! The trickiest part of a marshmallow is to get a pourable consistency. I like to use a ready test where you turn off the kitchen aid and lift the whisk to see if it falls easily and forms ribbons while dripping from the whisk.
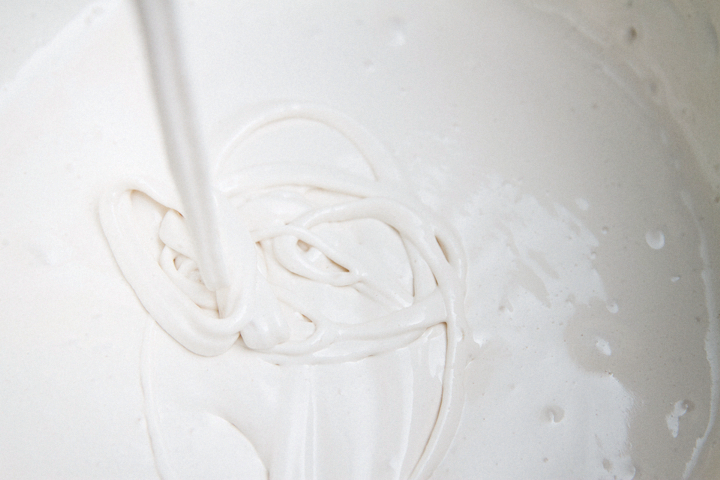
- Last is to add the flavor. Beat in fresh vanilla seed for 5 seconds.
- Pour the marshmallow into your 12×9 prepped pan or mold. Use a knife or an offset spatula to smooth out the top.

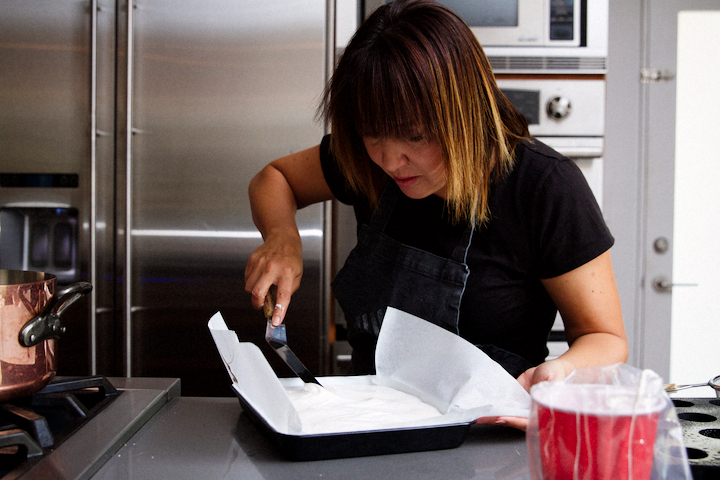
- Next, is to make sure you immediately cover your marshmallow with sifted powdered sugar. Trust me, it will make all the difference with handling later. You can dust it off once they are set (a few hours).
- Next, invert the pan and then cover the other side of the marshmallow with powdered sugar. This part is a bit messy, so maybe do this part on large sheet of parchment paper. I like to use a natural bristles makeup brush to remove the excess confectioners sugar.
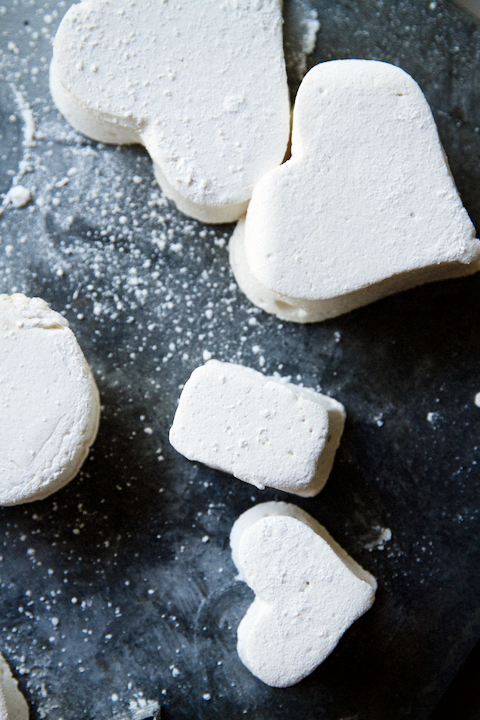
Marshmallow Blocks: This is the most common way that marshmallows are prepared. They are made in a sheet pan and then cut into squares. You can also use cookie cutters to get a particular shape.
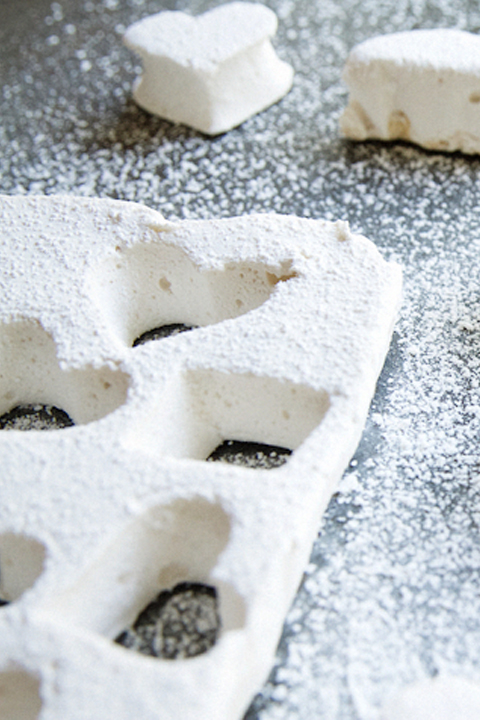
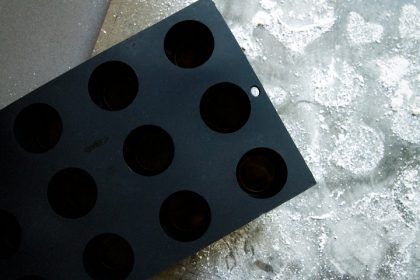
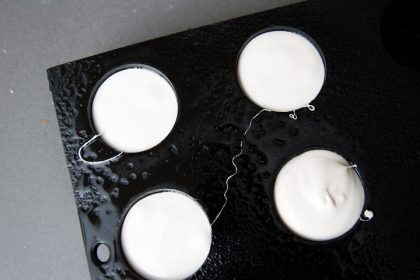
Marshmallow Molds: To get that classic marshmallow shape, use a round mold. I find the cleanest method is to pipe it into the mold itself using a ziplock bag.

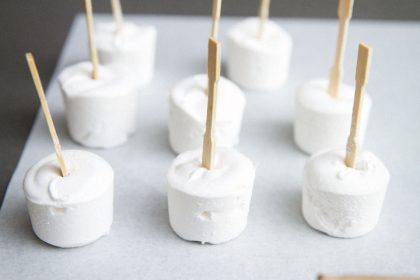
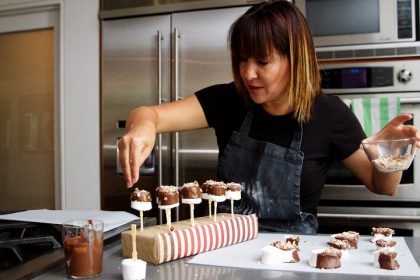
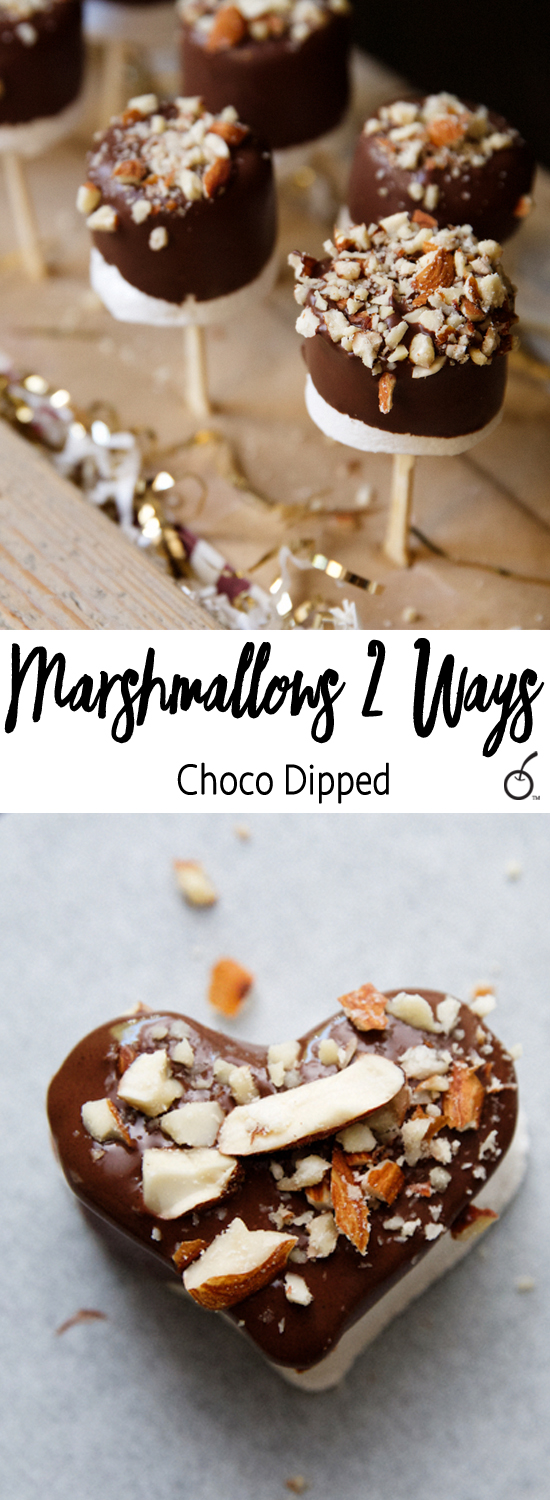
Marshmallow Pops: If you want to make pops, I highly recommend using a shaped mold. You can add the lollipop sticks right after you sprinkle it with powdered sugar and it will stay upright.
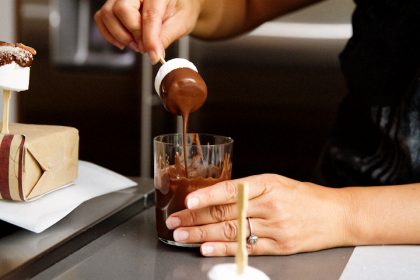
I used one of my favorite chocolate melts called Chocoley. They have so many varieties I go a bit nuts! They sell them on Amazon, but you have to buy them in bulk and I like the smaller bags, so I usually go straight to the source. Another great go-to for chocolate melts are the Ghirardelli chocolate melts. Those you can find in most supermarkets.


Once your chocolate is good and melted, dust off any excess powdered sugar and get dipping! Immediately sprinkle your chocolate dipped marshmallows with a pinch of roughly chopped almonds and you are set to go.
 The good news is that you can use any shape or size. I love to mix and match, whats your favorite?

Photos by: Maria Hedrick Photography
1Prep Pan or Molds: Generously spray parchment lined 12x9 pan or mold. 2Kitchen Aid (whisk attachment): Sprinkle gelatin over 3/4 cup water, whisk it for even distribution, and let it sit. 3Stovetop: Combine remaining water, sugar, and corn syrup in a saucepan. Cook over medium heat until sugar dissolves. Then, put on high and cook to 240F. 4Combine in Kitchen Aid: Once stovetop mixture is ready (at 240F), then add hot syrup into the gelatin mixture and continue beating on high for 8-10 minutes until mixture triples in volume and becomes rather thick (but not too thick that it is not pourable). Test the readiness by turning off the kitchen aid and lifting the whisk to see if it falls easily and forms ribbons while dripping from the whisk. Beat in fresh vanilla seed (or other addends). 5Molds: Pour into prepped molds, and be sure to add lollipop sticks and immediately sprinkle exposed side lightly with powdered sugar. Let sit for a few hours (6-8) until it pulls away from the side of the mold. Next, dust a cutting board with powdered sugar and coax the marshmallow out of the mold using your fingers or offset spatula if necessary and set it on the sugar coated board. Roll it in powdered sugar so that all sides are covered. Then dust off powdered sugar so there is only a light coat remains. 612x9 Pan: Pour into prepped pan and immediately sprinkle the top with sifted powdered sugar. Let sit for a few hours until it pulls away from the side of the pan. Next, dust a cutting board with powdered sugar and coax the marshmallow out of the pan using your fingers or offset spatula if necessary and set it on the sugar coated board. Cut into squares and dip each cut edge into powdered sugar then dust off so only a light coat remains. 7Dip in chocolate and top with chopped nuts. Store in an airtight container for 3 weeks.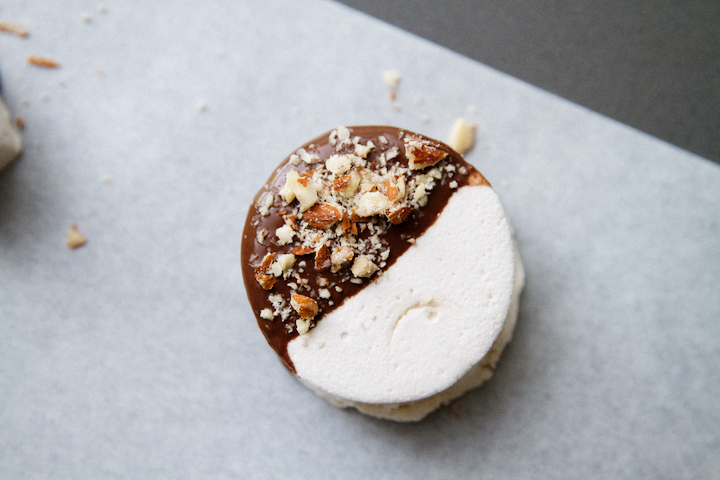
Directions


LET’S BAKE TOGETHER!
Don’t Miss A Recipe

Make These 10-Minute Super Bowl Desserts & Steal Game Day Cheers!


Yum! Elizabeth and Ethan love marshmallows. These look really good! Thanks for sharing the recipe.
Thanks Anna. So glad your kids love marshmallows, mine do too! Every once in a while we indulge in this fun dessert!
These are too cute. Plus, homemade marshmallows? Um, yes please! They just look so fun to make! As for shapes? I think I would eat ’em all, but hearts would be perfect for Valentine’s day, maybe on top of some hot chocolate 🙂
Thanks Dawn! Hot chocolate sounds perfect right now as we are getting all kinds of rain over here in Los Angeles.
Well how fun are these!?! I’ll be honest, I haven’t made marshmallows since Culinary School, and as I was reading this I was wondering why! Probably because I’m lazy. lol. Thanks for the awesome step by step, because my marshmallow making skills are DEFINITELY rusty!! Love that you coated these in chocolate and then dusted with with nuts! It’s official. I’m NUTS for these! 😉 Cheers, dear!
How funny! I feel the same way about certain desserts – When I was in school, I messed up croquembouche and pate choux so many times, that eventually it became funny. Our chef made it her personal goal to torture my arms with making pate choux over and over and over and over again. Needless to say, my arms grew major muscles and I conquered it. (Still scares me at home).
These look like too much fun! I love the presentation too – you’re always thinking up the most creative ways to serve these goodies. Can’t wait to try! My roommates will probably eat these all within seconds.
Thanks Ryan. Glad you have hungry roommates, best to keep them happy with squishy marshmallows. Good things will happen!
These marshmallows are so adorable. I’ve never made them before so I appreciate all the tips. I think this something my daughter would enjoy making with me. 🙂
Thanks Annemarie. I love marshmallows and it is such a great way to share so many fun flavors. Have fun if you make them with your daughter and be careful with that hot sugar!
For a beginner, would you say the pops or the baking sheet is easier? I would love to try these, but I can just picture me trying to scrape the finished pops out of the pan and destroying them in the process. Should I stick with the cubes to start? It all just looks so sticky.
I think the baking sheet is the easiest way to approach it for the first time. It sort of just falls out of the kitchen aid into the pan almost like a super thick cake batter. Try that first and get the hang of the ribbon test for the marshmallow doneness, then move on to manipulating the marshmallow into cute shapes. When you try it in the sheet pan, you can cut it with a knife. It is sticky business for sure, but using powdered sugar will help reduce the ‘stick.’ Cheers April!
Okay I must confess, I am not a huge fan of marshmallows at all, but both of my sisters are marshmallow fiends with January and February birthdays…. I feel a Sweet Nerd inspired baking day coming on!
Love that…. bake away my sweet nerd sista!
These look super yummy and sweetly decadent – plus major bonus that they’re gluten-free!
Thanks Lorna. I love marshmallows, they are beautiful and delicious on so many levels. They are such a great transporter for a million different flavors too. And yes, super bonus – they are gluten-free!