
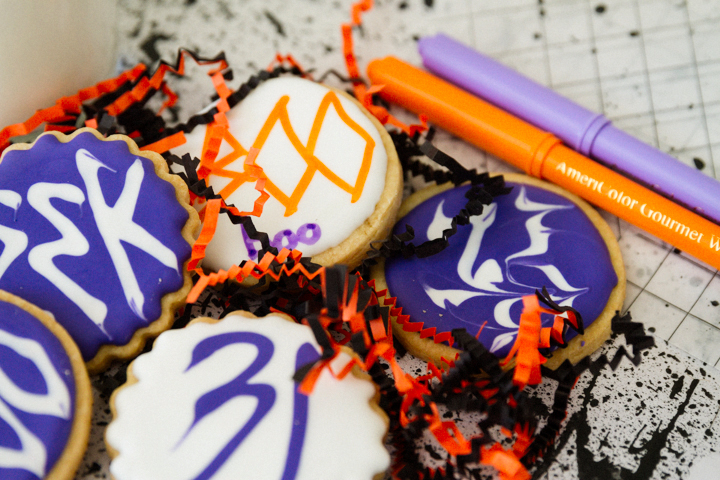
I’m going to give you a three’fer in this one post — yep, three-for-one font-astic ideas. Like that play on words? What I mean is I’ve got three edible ways of writing on Halloween cookies: flat, raised with glitz, and edible markers. The first uses royal icing as the font called, “wet on wet” technique (see EEK cookie in photo as example) the second uses a technique where you apply a ‘raised layer of royal icing’ and glam it out with glitzy sugars, and the third uses AmeriColor Gourmet Writer pens to write in a haunting, street-smart font (see BOO cookie). Let’s get spookin’ peeps.
The sugar cookie recipe I use is my tried-and-true Perfect Sugar Cookie recipe. Whip up a batch day of or a few days before (store the dough in the fridge) and roll out for decoration when you’re ready for cute Halloween cookies.
WET-ON-WET: SPOOK UP YOUR HALLOWEEN COOKIES WITH ROYAL ICING
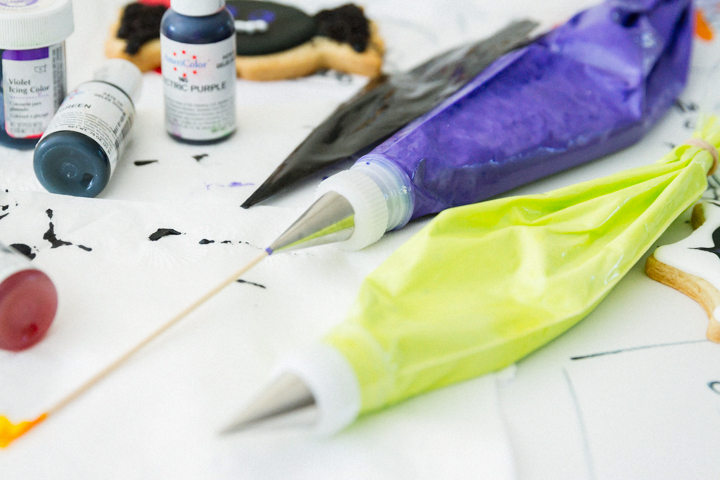
Once you’ve selected your colors, fill multiple piping bags and add your tips (for this recipe, I used Wilton #1). A great trick I’ve found to work every time is to plug the tip with a toothpick when you’re not using the icing. This way the icing at the tip doesn’t dry and clump and come off on the precious Halloween cookies.
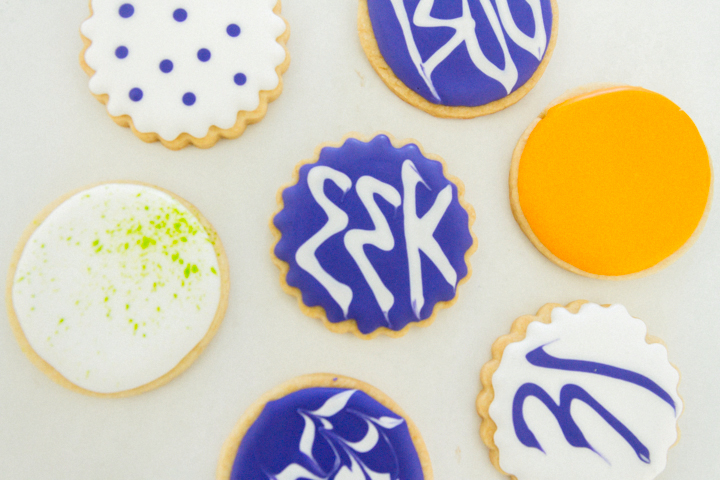
I used the wet-on-wet technique to write in the “EEK” and “31” design. You are flooding back-to-back with purple and white to create a design that appears ‘flat’ and has one clean surface. So the first step is to flood the entire cookie base with your background color (I heart purple!). Immediately, you flood with the font color white to spell out “EEK” in graffiti style! While you wait to chomp on these fun designs, sketch out what you want your cookie design to be.
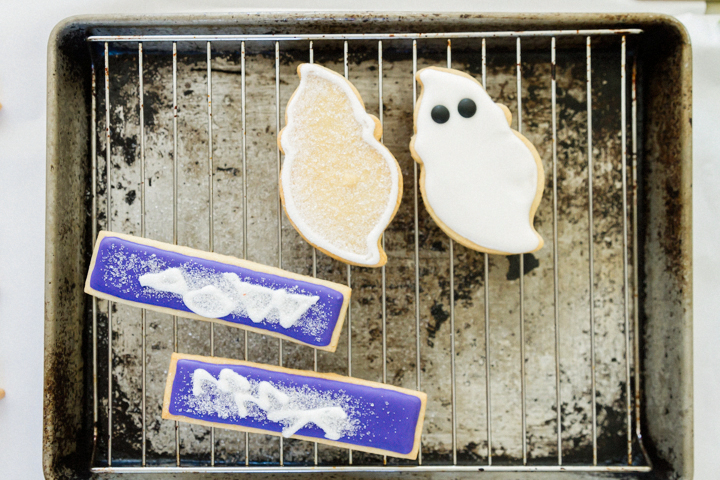
OUTLINING: RAISED DESIGN & GLITZ
Once you’ve selected your colors, fill multiple piping bags and add your tips (for this recipe, I used Wilton #1 or Ateco 1 or 2). Fill your cookie base with purple and then let it dry completely. Some folks suggest 24 hours, but shoot, who has 24 hours to revisit a cookie? I say, let it dry (just enough to the touch) and then go for writing the second ‘raised’ layer.
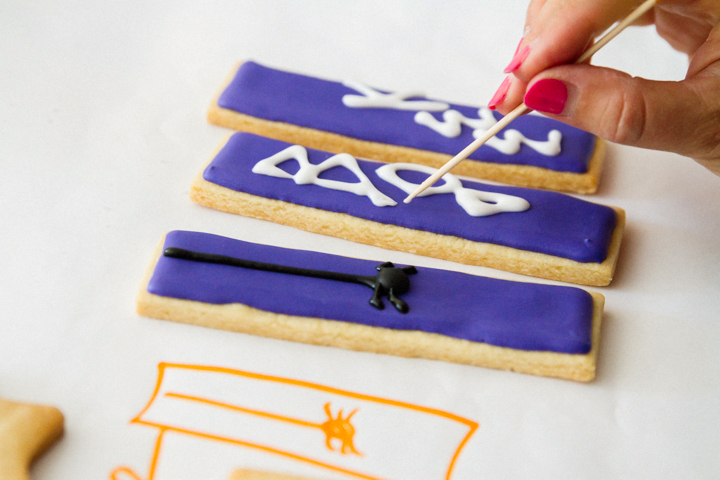
Next, use white to write in whatever spooky font you love. I personally love street art style, or a graffiti-like font, and so after writing BOO, I then drag out the letters slightly to give it a drip effect.
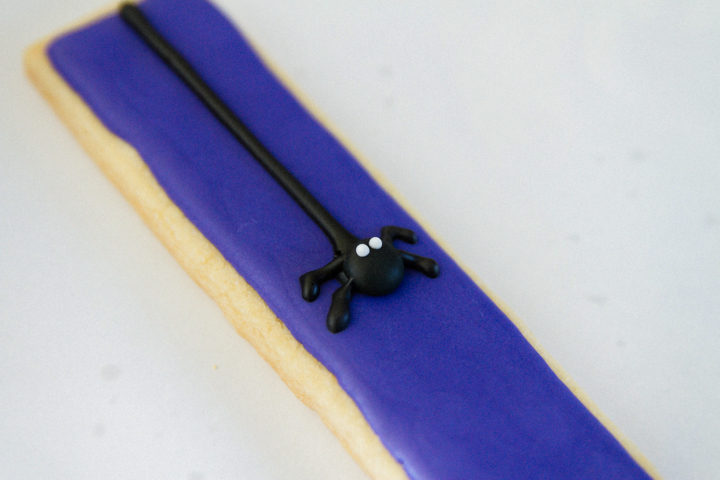
This cute little spidey needs to wait to drop down from his web until the base coat of icing is completely dry (otherwise it will be wet-on-wet, eek!)
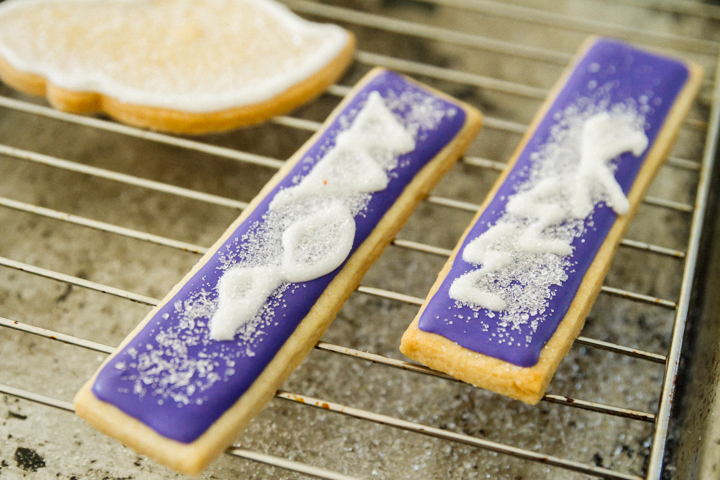
ADD SOME GLITZ TO YOUR HALLOWEEN COOKIES!
It’s best to sprinkle on edible sanding sugar when the royal icing font is still wet, so the glitter will stick. Shake off excess after the royal icing is completely dry to the touch. If you do it too soon, it will clump, but if you wait awhile the sanding sugar will whisk right off the cookie.
EDIBLE MARKERS FOR YOUR FONT
The AmeriColor Gourmet Writer pens make the decorations easy – a raised hair easier than the royal icing font because all you have to do is pick up a pen, no piping bags to get out or tips to clean. You’ll want to pick a lighter base coat as your canvas, like a white, so that you can have more Americolor hues to choose from. And scribble away!
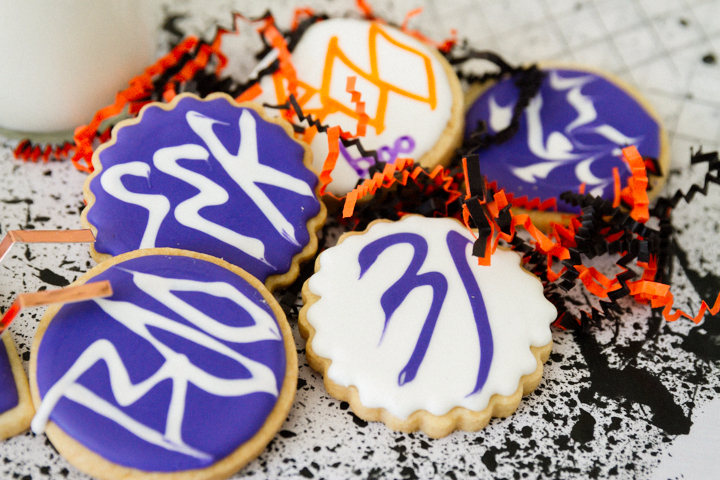
Remember, the base cookie shape is up to you — I used rectangles, circles, and ghost cookie cutters but anything works! Just pick a shape that gives you enough room to write what you want. “Halloween” is a long one, but BOO! and EEK! and the ominous “31” all work well.
Photos by: Maria Hedrick Photography
October 5, 2019 Sugar Cookies 1Dries: Whisk flour and salt in a bowl. Set aside. 2Base: In a mixer, cream together butter and sugar. 3Next, add eggs, vanilla and optional flavorings of citrus zest or spices (ie: cardamom). 4Gradually, add dries to base just until incorporated. Chill in refrigerator up to one hour. Roll on lightly floured surface. Cut shapes and refrigerate to chill. 5Bake at 350F for 8-10 minutes or until edges are slightly browned. Note: when you cut into a shape, chill in freezer to set. Then, transfer directly to hot oven. Royal Icing (shared from Sweet Sugarbelle) 1Add vanilla flavoring into 1/2 cup water and set aside until step 3. 2In the mixer (paddle attachment), gently mix confectioners sugar and meringue powder on low. 3Add 1/2 cup flavored water and mix on low until it is thick and lumpy. 4Drizzle the remaining water as needed until it becomes a thick like honey consistency. 5Turn mixer on medium speed for 2-3 minutes or so until icing is thick and fluffy. Stop when it forms a soft peak. If you are not using immediately, keep stored in airtight container. 6Separate into mixing bowls and adding 1/2 teaspoon at a time until icing becomes thin and a '10 second consistency', meaning threads of icing fall off a spoon and are absorbed completely back into the icing within 10 seconds. 7Now add Americolor gel drops, one at a time until you get the desired color. 8Load your piping bag, and get ready to make some fun sugar cookies. 9Tip: place a toothpick on the end of the Ateco or Wilton tip to avoid air from drying the royal icing. Icing Techniques 1Wet on Wet Technique: Start by outlining, then flood with the same color. Immediately, add in font wording like "Eek" or "Boo" in contrast icing. Drag corners of font lettering with a toothpick tip and drag slightly to create a drip look. 2Raised with Glitz Technique: Start by outlining, then flood with the same color. Let it completely dry. Then add contrast icing, and sprinkle generously with sanding sugar. Set aside until completely dry. Then brush off with a toothpick or a brush the excess sanding sugar. 3Edible Marker Technique: Start by outlining, then flood with the same color. Let dry. Once completely dry, be artistic and use the edible markers to let your inner artist loose!Eek Font-astic Cookies!
Directions


LET’S BAKE TOGETHER!
Don’t Miss A Recipe

Glam Up Halloween with this Sweet Ombre Spread


Fabulous! Such fun cookies and loving that pen!
Thanks Jennifer. I am sorry for my late response. Appreciate the love and I would be so lost if I didn’t have my pens!
Love the pen – so simple! I hope I can order off Amazon. Stat.
Yes, for sure you can get it online. There are a few types out there, but I love the Wilton and Foodwriter.
What a fantastic post! Thanks for the 3 different techniques I want to try them all 🙂
Awww shucks. Thanks Kendall. Please do try them all.
Thanks for all the info Cindy! Such fun cookies! Cool pen!
Thanks Maryann. I feel like a kid when I play with writing on cookies.
LOVE these cookies and your tutorial Cindy!
Thanks so much Alida. I am crushing big time on these street cookies.