
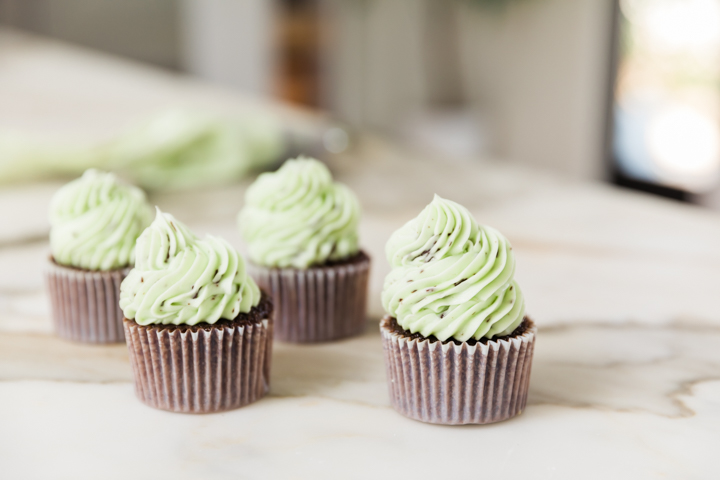
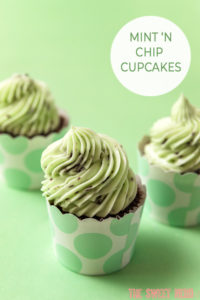
Cupcakes take two! These Mint Chocolate Chip Cupcakes made with tons of chocolate, peppermint extract and chocolate shards in the frosting disappeared quickly in my kitchen. Miss A. and Liam continued their September initiative to bake and decorate cupcakes to ease their way back into school.
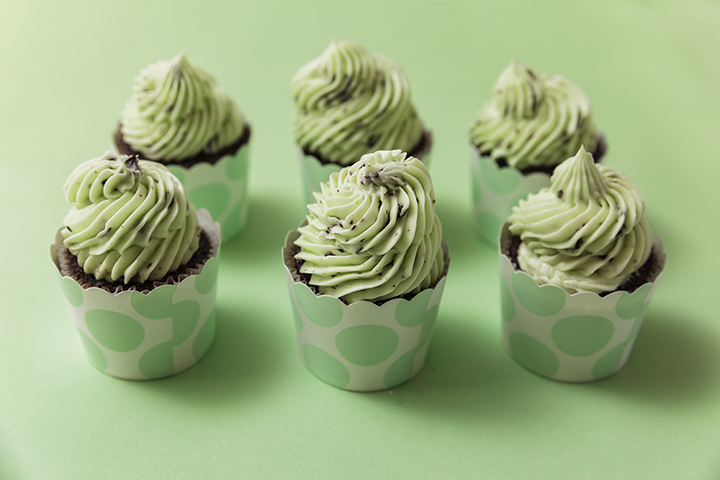
Thanks to Liv for Cake for inspiring these cupcakes with her mint chip cake. So yum. After baking in a cupcake liner, I slid the cupcakes into these mint green cupcake liners for presentation.
Very important note: if you are making mint chocolate chip cupcakes for kids, the frosting MUST be colored green. My boys are very anti anything mint if it’s not green – they swear the green makes them taste more minty. So yes, you bet I used food coloring in Leaf Green, and although you can use any mint extract, I used peppermint flavoring.
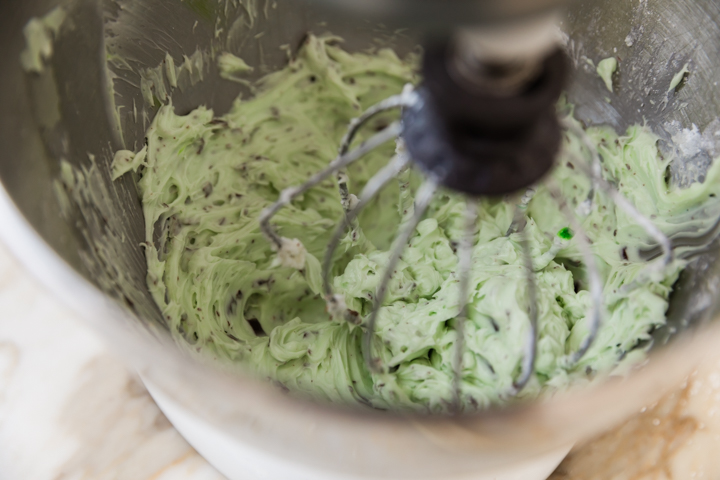
For the buttercream frosting I took a chocolate bar and cut it into shards. Nice big chunks in every bite.
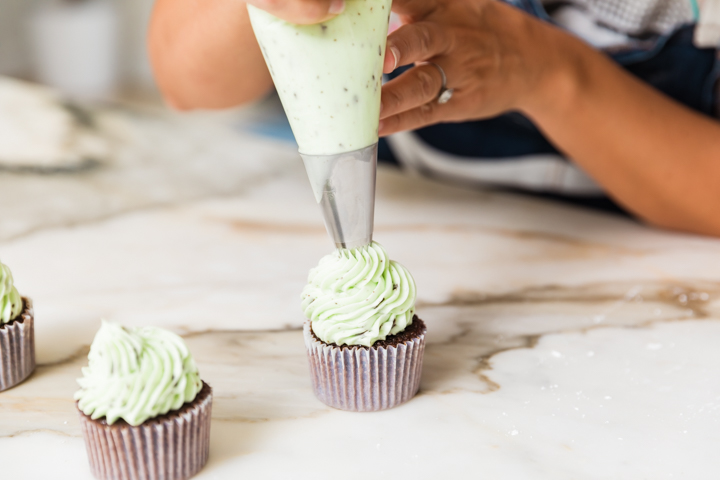
Pipin’ away. The star tip made it easy peasy.
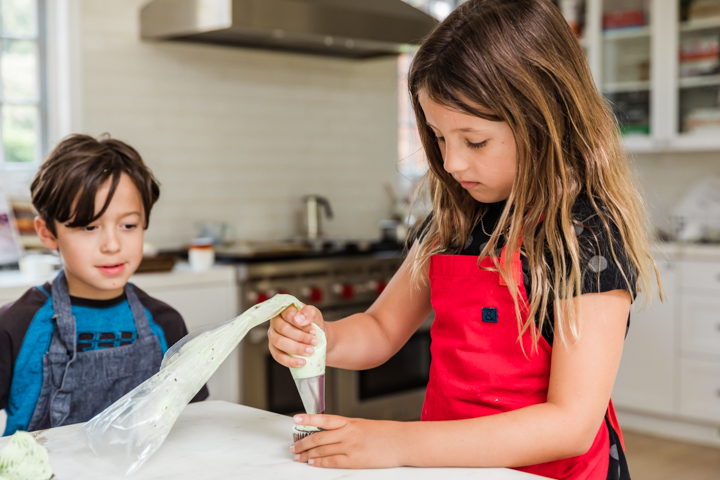
Miss A is killing it – and Liam admires her work from the wings.
OUR FAVES
- Liv for Cake, Mint Chocolate Chip Cake
- Nielsen-Massey, Peppermint extract
- Paper Eskimo, Cupcake liners in mint green

Photos by: Maria Hedrick Photography
Cupcake 1Preheat the oven to 350 F (175 C). Line two 12-cup muffin pans with cupcake liners. 2In a large bowl, sift together the flour, cocoa, baking powder, baking soda and salt. 3Put the eggs, milk, oil and vanilla in the bowl of a stand mixer. Pour the sugar on top, and then add the dry ingredients. Use the paddle attachment at low speed to blend the ingredients until the mixture is completely smooth. Add the boiling water, and stir carefully so that it doesn’t splash until the batter is smooth again. Let the batter rest for 15 minutes 4Fill the muffin cups three-quarters full. Bake until the tops are firm and a cake tester inserted in the center of a middle cupcake comes out with just a few crumbs clinging to it, about 20 minutes. Let the cupcakes cool for 5 minutes in the pans before removing them to a rack to cool completely. Frosting 1In a stand mixer fitted with the paddle attachment, cream the butter. Start with the mixer at the lowest speed, then gradually increase the speed, using a rubber spatula to scrape the bowl as needed, until the butter is light in color, is perfectly smooth, and makes a slapping sound as it hits the sides of the bowl. This should only take 30 seconds, but if the butter is cool, it can take a couple of minutes. 2Add the sugar, 1 cup (about 110 g) at a time, and mix at the lowest speed until it’s fully incorporated before adding the next cup. When all the sugar has been added, scrape the paddle and the bottom and sides of the bowl. Add the vanilla and salt, and beat at low speed for 15 seconds. Increase the speed to as high as you can without making a mess, and whip the buttercream until it is perfectly smooth, creamy, and light, about 5 minutes. Stop the mixer once or twice to scrape the bowl and paddle, then continue beating. At first the buttercream will appear to soften, then it will stiffen and increase in volume. 3Add in green color gel. Pulse in chopped chocolate. 4Use right away, or store in an airtight container for up to a week in the refrigerator. When you’re ready to use it, let the buttercream come to room temperature, then put it back in the stand mixer and use the paddle attachment to beat it until it’s creamy and stiff again.Directions


LET’S BAKE TOGETHER!
Don’t Miss A Recipe


I love how pretty these are and you made it seem super easy with the right icing tip! I need to start pushing myself to bake more I really do enjoy it 🙂
Totally true on the right icing tip. That is the biggest part of being able to decorate beautifully. Cheers Kendall.
I love mint chocolate chip everything. What a great idea to use it as a frosting. Can’t wait to try this!
Amanda, let me know what you think of the recipe. I was inspired by one of my favorite bloggers who did a fabulous mint chip cake. It was incredible and beautiful. Hope you enjoy it.
These look SO yummy – perfect for baking season. Cannot wait to try them!
Bethany – let the baking season begin! This is such a fun time of year. I love it.
These cupcakes look so gorgeous!!! I still have to master my frosting skills and you made these look so easy to tackle.
Calleigh, I promise the star tip does a lot of the work for you. Enjoy!
I love a good mint dessert! These not only sound amazing but they are so pretty! I love the green color!
Thanks Haley. These were cute, but the taste will have you swooning!
I love your kiddos won’t eat mint anything unless it’s green…I understand that on so many levels. These looks wonderful.
Thanks Michelle! You are sweet for recognizing that kids are kids – and green means mint. Ha!
These are so cute and would be perfect for St. Patrick’s Day!! Yum!